
Renovation Process
In May 2021, Nathan and I bought our first home. During our short-lived house hunt in a largely sellers market, we knew we wanted an open concept with modern interior design. It took two weeks and a little over 10 showings for us to find the one. While the house didn't have an open concept and certainly not a modern interior, the second we walked in, we saw great potential. With lots of work, we knew we could transform this house into our home. Not only did we get lucky with finding the perfect house so soon, we also had our offer accepted a few days afterwards.
Some of my fondest memories are from living in several houses, all in the same city but different neighborhood, as I grew up. Each house we moved into became my dad's new project. Among the 4 houses I grew up in, he built a laundry room to fill the high-vaulted ceiling space, a sunroom to expand the main floor footprint, several decks, a toolshed, and much more. Knowing my dad had lots of experience with and love for home renovating, Nathan and I began to draft our plans. We were extremely fortunate to have the help of my dad, who basically served as our private contractor. for the 3.5 months we spent renovating. Through the years and many houses, he had built up an amazing and extensive tool collection, which was another perk.
Using the approximate blueprint found online and the Sweet Home 3D software, I began to draft a more accurate model of our house. The first weekend after we signed, we took measurements of each room to properly adjust the model. With it, we played around with potential floorplan changes. The major change we decided on was to knock out the wall separating the kitchen and dining area to materialize our desire for an open concept layout. We also wanted to expand the master bathroom, as the shower was extremely tight (I called it the 'prison shower'). The below figure shows the original floorplan, prior to renovating.
The kitchen demolition and general dismantling of the house interior was our first focus. Every room was stripped bare, and honestly it was quite fun. The demolition weekends were long and hectic but so satisfying.
Above, in the lower right photo you'll see one of the Bagsters we filled with insulation, hardwood, ceramic tile, and other trash. Trash piled up quicker than we could get rid of it!
Once we removed the kitchen wall, we started on the electrical work. We added ceiling lights (every room excluding the dining area and kitchen required floor lamps), ran network cable, and rewired, added, and removed all outlets and switches. Soon after, we decided to get the electrical (and other) work permitted and I learned some of the lesser known residential electrical codes. The inspection went well, as we only had to move a few outlets in the kitchen and rewire so that the bathrooms were on their own circuit breaker.
Original Floorplan of Main Floor


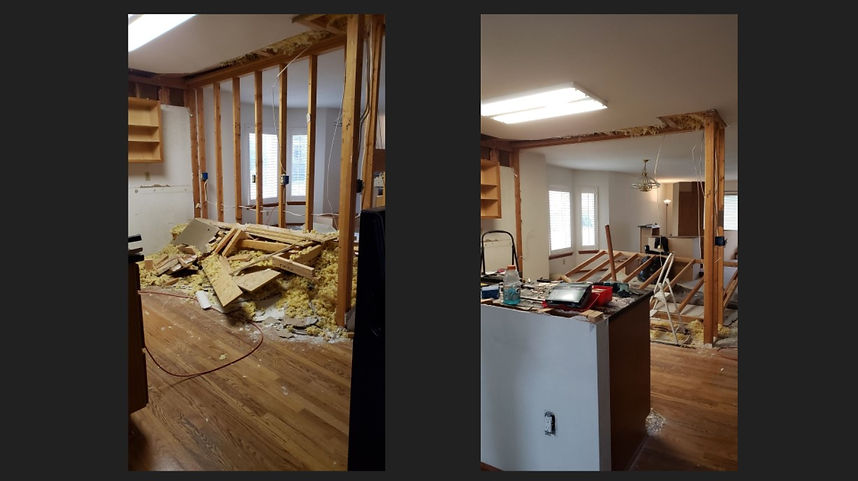


Kitchen Demolition
Master Bedroom Demolition
Bagster: 1 of many

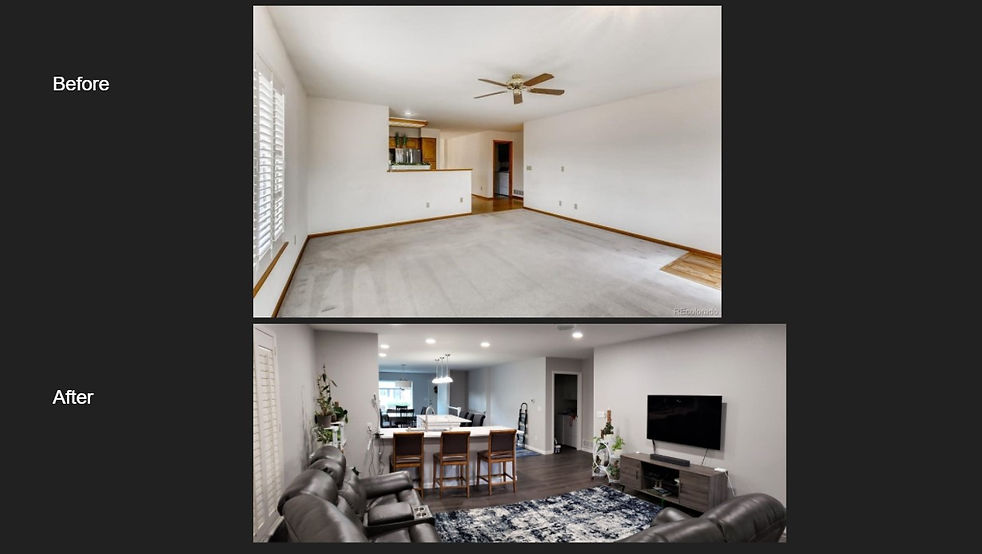
The photo to the left was captured when we first toured the house. The small ceiling light offset from the fan was the only light source in that large room. It was also at an awkward location, near the edge of the room so we removed it and patched the drywall.
Family Room, Pre-Renovation
And then there was light! The LED can lights made a huge difference and illuminated every square inch of the room (maybe that's why I was so concerned with perfecting my paint job and straight edges). This photo also shows the repainted trim. We pulled off the base trim for a taller, more modern aesthetic, but the rest was sanded down, filled, and painted. I still have nightmares about that process - it was certainly a test of my patience!

Family Room, Mid-Renovation
In parallel, we started to work on remodeling the master bathroom and conveniently had enough scrap for the frame from demolishing the kitchen. This work was during the mid-pandemic period when the price of lumber soared, so we were very careful and resourceful with reusing what we could. After a few hours of brainstorming with Nathan, his dad, and my dad, we settled on the most optimal and space-efficient design for the master bathroom. We decided to use the dead space in the master bedroom to incorporate into the bathroom by pulling out the wall a few feet and positioning the door at an angle.
Eventually, we got around to patching the ceiling in the kitchen and bathroom which made all the difference in the heat of July. In the photo below, the huge drywall sheet we had to lift is resting on the island we added.


Master Bedroom and Bathroom Redesign
Kitchen Ceiling Patching
I finished painting, which then allowed for us to focus on installing the LVP flooring. We spent more time sanding the subfloor, ensuring all carpet and hardwood staples were removed, and covering wtih Kilz than it did to actually lay the LVP.

Installation of LVP
Skipping ahead, in August our kitchen cabinets were reskinned and new doors were installed. This and the bathroom tiling were the only projects we hired out. Nathan and I did, however, want to try our hand at installing our kitchen backsplash.
I learned so much through this process and from my dad, and I am so grateful. Despite the 3.5 months worth of long weekends, the renovation process was so fun and worth it. Nathan and I both loved the customization aspect and it was so freeing to change the design as we imagined new possibilities. We plan to dive back into it once we have saved up more money to finish the basement, but for now we are catching our breath and enjoying our beautiful home.


Final Floorplan, Post-Renovation
Last Updated 2022